Building Bright Futures: A Parent’s Guide to Choosing Engineering Kits for Preschoolers
Why Engineering Kits for Preschoolers Matter More Than You Think
When we hear the word “engineering,” we often picture towering bridges, complex circuits, or whiteboards crowded with formulas. But for a three-year-old, engineering is something far more instinctive: it is the joy of stacking blocks until they tumble, the triumph of fitting a square peg into a square hole, and the quiet concentration of building a ramp for a toy car. Engineering kits for preschoolers are not about turning toddlers into miniature civil engineers. They are about nurturing a mindset—curiosity, persistence, problem-solving, and spatial reasoning—that will serve children for the rest of their lives. Research in early childhood development consistently shows that hands-on, constructive play strengthens executive function, mathematical thinking, and even language skills. When a child decides that a tower needs a wider base, they are experimenting with physics. When they insist on using a long plank instead of a short one, they are engaging in comparative reasoning. Therefore, choosing the right engineering kit is not a trivial shopping decision. It is an investment in how your child learns to approach the world. This guide will walk you through every critical factor, from safety and age appropriateness to educational value and long-term playability, so you can make an informed, confident choice.
Safety First: Non-Negotiable Criteria for Ages 3–5
Before you even consider colors, themes, or educational claims, safety must be your absolute priority. Preschoolers are notorious for putting objects in their mouths, and their motor skills are still developing, which means they can accidentally break pieces or choke on small parts. When evaluating any engineering kit, check the age recommendation printed on the box. Reputable manufacturers follow strict guidelines: kits labeled for ages 3 and up should have no small parts that fit entirely inside a standard choke tube. Look for the ASTM or CE safety marks, which indicate that the product has been tested for hazards such as sharp edges, toxic materials, and small components. Also, be wary of kits with magnets, especially rare-earth magnets, which are extremely dangerous if swallowed. For preschoolers, any magnet should be large and securely embedded. Another overlooked safety factor is the material itself. Many inexpensive kits use brittle plastic that splinters or breaks into sharp shards. Choose kits made from high-quality, durable materials—solid wood, thick food-grade silicone, or sturdy ABS plastic that has been rounded at all edges. If the kit includes tools, such as a plastic screwdriver or wrench, ensure they are child-friendly: blunt, lightweight, and too large to be swallowed. Finally, consider the environment where your child will play. A kit with many tiny loose pieces may be fine for a six-year-old, but a three-year-old needs larger, chunkier components. Always supervise initial play sessions, and remove the kit if you notice any signs of wear, cracking, or loosening of parts.
Matching the Kit to Your Child’s Developmental Stage
Not all preschool engineering kits are created equal, and the differences between age three and age five are enormous. A child who has just turned three is still mastering basic hand-eye coordination. They need kits that require only simple actions: pushing, pulling, stacking, and connecting with a gentle snap. At this stage, oversized building blocks, magnetic tiles with thick edges, and simple gear sets with large, interlocking cogs are ideal. The goal is not to follow a complex instruction manual, but to explore freely. By age four, most children can handle more deliberate actions, like twisting a plastic screw or aligning two pieces with an axle. They also begin to understand sequencing and cause-and-effect relationships. Look for kits that include simple blueprints or picture cards showing a car, a house, or an animal. This introduces the idea of planning and following steps—a foundational engineering skill. By age five, many preschoolers can manage kits with multiple connection types, wheels, pulleys, and even basic levers. They can sort parts, count them, and compare lengths. They may also start inventing their own designs and telling stories about their creations. For this age, a kit with modular components, such as interlocking plastic beams, connectors, and wheels, offers the perfect challenge. Avoid kits that are too advanced, as frustration can quickly turn into discouragement. A good rule of thumb: if you, as an adult, need to read a dense manual to assemble a model, the kit is too complex for a preschooler. The best kit sits right at the edge of your child’s current ability—challenging enough to spark new thinking, but achievable enough to build confidence.
The Right Materials: Durability, Texture, and Size
Children learn through their senses, so the tactile experience of an engineering kit matters just as much as its intellectual content. Wooden kits offer warmth, a pleasing weight, and a natural texture that some children prefer. They are also extremely durable, and many can be passed down through siblings. However, wooden blocks do not typically allow for moving parts like gears or wheels unless the kit is specifically designed with wooden axles and pulleys. Plastic kits, on the other hand, enable more complex mechanisms—snap-fit connectors, ball-and-socket joints, and spinning gears. When selecting plastic, look for materials that are free of BPA, phthalates, and other harmful chemicals. The pieces should feel substantial, not flimsy. A piece that bends or flexes too much will frustrate a child who wants a firm joint. Size is another critical factor. Pieces should be large enough for small hands to grasp and manipulate, generally no smaller than a child’s palm. But they should not be so large that the kit becomes cumbersome or limit the complexity of builds. A good set includes a mix of sizes, from larger base plates to smaller connectors, but all above the choke threshold. Also consider the texture. Glossy, slippery pieces can be hard for little fingers to grip, while matte surfaces offer more friction. Soft, pliable parts, such as silicone gears or flexible tubes, add a delightful sensory variety. Ultimately, the right materials are those that feel good, last long, and invite repeated use. If a kit feels cheap or fragile in your hands, it will not survive the passionate play of a preschooler.
Open-Ended vs. Goal-Oriented Kits: Striking the Balance
One of the biggest dilemmas parents face is whether to choose an open-ended kit, like classic wooden blocks or magnetic tiles, or a goal-oriented kit, like a set that builds a specific robot or car. The answer is that preschoolers benefit from both, but in different ways. Open-ended kits allow children to follow their own imagination. There is no right or wrong, which promotes divergent thinking and creative problem-solving. A magnetic tile can become a castle, a rocket, or a dog. This type of play is excellent for building executive function and self-regulation, as the child must decide what to create and how. However, pure open-ended play does not always teach the structured problem-solving that comes from working toward a defined outcome. Goal-oriented kits provide instructions or visual diagrams. The child must match colors, count holes, align axles, and follow steps. This develops sequential thinking, early literacy (interpreting diagrams), and persistence. The satisfaction of completing a model—say, a windmill or a three-wheeled cart—gives a powerful sense of achievement. The best engineering kits for preschoolers combine both approaches. Look for sets that come with a handful of starter models, but also have extra pieces that encourage free creativity. For example, a kit might have instructions for building a bridge, but the child can then modify the bridge to make it taller, wider, or stronger. When shopping, read reviews and look at the packaging. Does the kit advertise “10 models in 1”? That is often a good sign, as it offers multiple challenges while still allowing original design. Avoid kits that lock a child into a single, rigid structure with no room for variation.
Look for Real Engineering Concepts, Not Just “Toys”
Many products on the market claim to be “STEM” or “engineering” kits, but in reality, they are just colorful piles of random shapes. A genuine engineering kit for preschoolers should expose children to fundamental concepts such as balance, stability, gravity, force, motion, and spatial relationships. How can you tell the difference? Examine the components. Does the kit include structural elements like beams, columns, and plates? Are there connectors that allow for right angles, pivots, or rotating joints? Does it feature gears, pulleys, levers, or wheels? Even simple items like ramps and balls can teach motion and trajectory. Consider the “engineering vocabulary” that the kit naturally enables. If you can use words like “foundation,” “support,” “axis,” “rotate,” “sturdy,” “collapse,” and “launch” while playing, the kit is doing its job. Another clue is whether the kit encourages testing and iteration. For instance, a good kit might include a small plastic ball and a set of track pieces. The child builds a track, rolls the ball, observes where it stops, then adjusts the track to make it go faster or further. This is the engineering design process in a nutshell: plan, build, test, improve. If the kit has no moving parts and no way to test an outcome, it may be more of a passive construction set than an engineering kit. Of course, there is nothing wrong with construction sets, but if you specifically want engineering benefits, look for components that can be connected in dynamic, non-static ways.
The Role of Screen Time and Digital Kits
In our digital age, many engineering kits for preschoolers now come with companion apps, augmented reality features, or programmable robots controlled by buttons. These can be incredibly engaging, but they require careful consideration. For children under five, the American Academy of Pediatrics recommends limiting screen time and prioritizing hands-on, sensory play. However, carefully designed digital integration is not necessarily bad. A few high-quality kits use a tablet or smartphone to scan a physical model, and the app then animates the model or offers hints. This can deepen understanding by connecting the physical object to a visualized concept, like showing how gears turn or how a lever lifts a load. The key is that the screen should be an accessory, not the core of the experience. Avoid kits where the child spends more time tapping a screen than manipulating physical pieces. Also, check whether the app is truly educational or just a set of videos and games. Some kits use “block-based” programming with physical blocks—for example, placing a block with an arrow to make a robot move forward. This is excellent for introducing logic and sequencing, but ensure the robot itself is durable and easy to control for small hands. There is also the issue of battery life and charging. A kit that requires frequent charging can cause frustration. If you are hesitant about digital kits, remember that many classic non-digital engineering kits are just as effective, if not more so, for preschool-age children. The physical act of testing a structure with your own hands is irreplaceable.
Practical Considerations: Budget, Storage, and Expandability
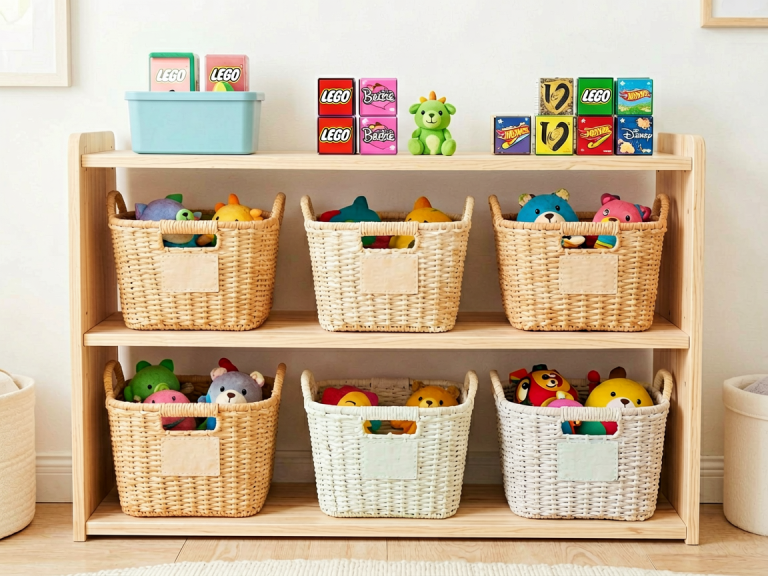
Engineering kits range from under twenty dollars to several hundred, and more expensive does not always mean better. The true value lies in the number of possible builds, the quality of materials, and how much the kit will grow with your child. Before purchasing, consider your budget and the potential for expandability. Some systems, like magnetic tiles or interlocking brick sets, are designed to be compatible with other sets. This means you can buy a small starter kit and gradually add more pieces for birthdays and holidays. Other kits are closed systems; once your child masters them, there is nothing more to do. For long-term use, check whether the manufacturer sells refill packs or expansion sets. Also, assess the storage requirements. Preschool engineering kits often come with dozens or even hundreds of pieces. If you do not have a dedicated storage solution, pieces will scatter, get lost, and create frustration. Look for kits that come with a sturdy storage bin, or invest in a clear container with a lid. Consider the size of your play area. A huge track or building system might be wonderful but can dominate a small living room. Some kits are compact and can be assembled on a lap tray or a small table. Also, think about cleanup time. If you have a child who loves dumping everything out, a kit with many tiny pieces may become a source of stress. Simpler sets with fewer, larger pieces are often easier to manage. Finally, consider the social aspect. Do you have siblings or playdates? Kits that allow for multiple children to build together can foster cooperation and language skills. A set with enough pieces for two or three children to share is often a better investment than a solo set.
Final Checklist Before You Buy
With so many factors to weigh, a quick checklist can help you make the final decision. Ask yourself these questions before you add that kit to your cart. First, is it safe? No small parts, no sharp edges, no toxic materials, and clearly age-appropriate. Second, is it durable? Can it withstand throwing, chewing, and the occasional tantrum? Third, does it match my child’s current developmental level, offering a slight challenge without being impossible? Fourth, does it include a variety of pieces that can be connected in different ways, rather than just a few fixed shapes? Fifth, does it promote real engineering thinking—testing, adjusting, solving problems—rather than just following a single instruction sheet? Sixth, does it have a good balance of open-ended and guided play? Seventh, is it compatible with future expansions or other sets we might already own? Eighth, can we store it easily, and is cleanup manageable? Ninth, does it offer good value for money, considering how many times it will be played with? And finally, most importantly, would your child actually love it? Choose a kit that aligns with their current interests—whether that is vehicles, animals, buildings, or outer space. A child who loves cars will learn more from a car-focused engineering kit than from a generic block set. A child who loves animals might prefer a kit that builds a dinosaur with moving jaws. When children are emotionally invested, the learning is far deeper.
Choosing engineering kits for preschoolers is not about finding the flashiest or most expensive option. It is about finding a tool that empowers your child to think, create, and persist. The right kit will not just fill a toy shelf; it will spark conversations, inspire curiosity, and lay the foundation for a lifelong love of problem-solving. So take your time, read the labels, touch the pieces, and imagine how they will feel in your child’s hands. With the choices outlined in this guide, you are now well-equipped to select a kit that is safe, engaging, and truly educational. And the next time you see your preschooler proudly balancing a precariously tall tower, you will know that they are not just playing—they are thinking like an engineer.