The Ultimate Parent’s Guide to Science Kits: Reviews, Ratings, and Buying Tips
—
Introduction
Every parent wants to nurture curiosity and a love for learning in their children. In an age dominated by screens and passive entertainment, science kits offer a tangible, interactive way to turn abstract concepts into hands-on adventures. But with hundreds of options flooding the market—from simple volcano eruptions to complex robotics—how do you choose the right one for your child? This comprehensive review guide is designed for parents who want to invest wisely in educational play. We will break down the essential criteria for evaluating science kits, highlight standout products across different age groups and interests, discuss safety and supervision, and offer practical tips for maximizing the value of every kit. By the end of this article, you’ll be equipped to select a kit that sparks genuine scientific inquiry without breaking the bank—or your patience.
—
Why Science Kits Matter for Your Child’s Development
Before diving into reviews, it’s important to understand why science kits are more than just glorified toys. High‑quality kits do more than teach facts; they cultivate critical thinking, problem‑solving, and fine motor skills. When a child mixes chemicals to create a glowing slime or assembles a miniature wind turbine, they are practicing the scientific method—hypothesizing, testing, observing, and adjusting. This process builds resilience and a growth mindset, as “failures” become learning opportunities. Furthermore, science kits can bridge the gap between school curriculum and real‑world application, making subjects like chemistry, physics, and biology come alive. For parents, a well‑chosen kit also provides a structured yet flexible opportunity for quality bonding time—a shared experiment can lead to rich conversations about why the sky is blue or how a rocket launches. In short, a great science kit is an investment in your child’s future curiosity and competence.
—
Key Factors to Consider When Choosing a Science Kit
Not all kits are created equal. Here are the critical variables every parent should evaluate before purchasing:
1. Age Appropriateness and Skill Level
Most kits indicate a recommended age range, but these are guidelines, not rules. A kit labeled “ages 8+” may still be frustrating for an 8‑year‑old with no prior lab experience, while a younger gifted child might find a simple crystal‑growing set boring. Look for kits that offer adjustable difficulty—some include extension activities for older kids or simplified instructions for younger ones. Pay attention to reading level: kits with dense instruction manuals can discourage independent exploration. For preschoolers, choose kits with large, safe components and minimal steps; for tweens, consider kits that introduce real lab equipment like beakers and microscopes.
2. Educational Value and STEM Focus
Ask yourself: Does the kit teach a genuine science principle, or is it just flashy? The best kits clearly explain the “why” behind each experiment. For example, a good circuit kit doesn’t just make a bulb light up—it explains voltage, current, and resistance. Check whether the kit aligns with topics your child is studying in school or areas you want to supplement. Many kits now explicitly tag themselves as STEM (Science, Technology, Engineering, Math) or STEAM (adding Art). While STEM focus is valuable, a kit that integrates creative design (like building a model of a DNA strand with colorful beads) can be even more engaging.
3. Quality and Safety of Materials
Children will handle chemicals, batteries, and small parts. Always verify that the kit meets safety standards (look for ASTM or CE markings). Avoid kits with toxic chemicals—prefer those that use common household items like baking soda and vinegar for reactions. Check reviews for reports of broken parts, leaky containers, or imprecise measurements. High‑quality kits often provide reusable components, durable plastic or glassware, and clear safety goggles. Also, consider the mess factor: some kits contain slime, powder, or liquids that can stain carpets. Read the description carefully and prepare a dedicated workspace.
4. Number of Experiments and Reusability
A kit that offers 15 experiments is better than one with 3—but only if the materials aren’t consumed after one use. Check whether refill packs are available for consumables like chemicals or clay. Some kits are designed to be used multiple times (e.g., a microscope with prepared slides plus blank slides for your own specimens). Others, like a single crystal‑growing kit, are one‑time experiences. For budget‑conscious parents, kits that combine reusable hardware with downloadable online lessons can provide months of educational fun.
5. Instruction Clarity and Support
Nothing frustrates a child—and a parent—more than vague instructions. Look for kits with step‑by‑step illustrated guides, color‑coded parts, and perhaps QR codes linking to video demonstrations. Some brands offer online communities or customer support for troubleshooting. A well‑written manual also includes background science explanations, fun facts, and discussion questions to deepen understanding.
6. Parental Involvement Requirements
Be honest about how much time you can dedicate. Some kits are fully child‑led after initial setup, while others require constant adult supervision (especially those involving heat, sharp objects, or electrical components). Kits targeted at ages 4–7 often require a parent to read instructions and manage messy steps. For older kids, you might prefer a kit that encourages independence. Read product reviews that mention “adult help needed” to gauge the level of involvement.
—
Top Science Kits Reviewed by Age Group
Here is a curated selection of popular and highly rated science kits, evaluated against the criteria above. Note that prices and availability vary, but these represent consistently reliable choices.
For Ages 3–6: National Geographic “My First Science Kit”
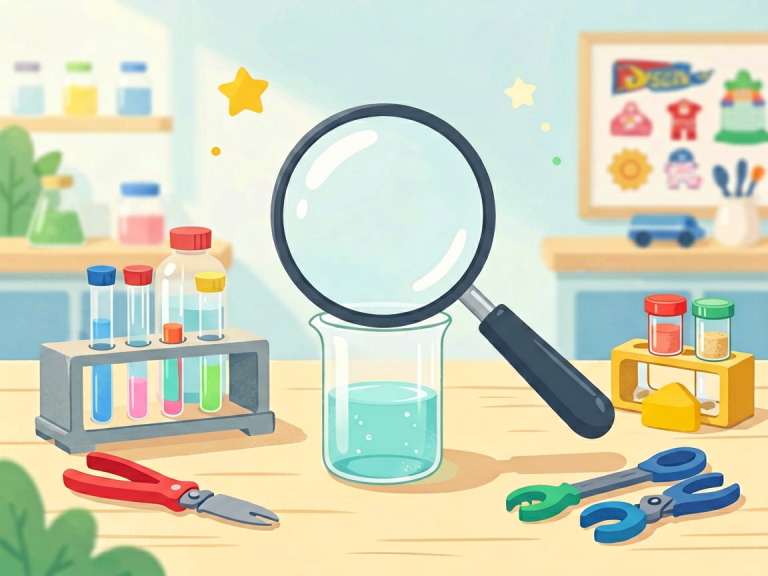
This kit is designed for tiny hands and short attention spans. It includes non‑toxic, oversized supplies such as a magnifying glass, color‑changing liquids, and a simple volcano mold. The instruction booklet uses large pictures and minimal text, making it easy for a parent to guide the child through 5–6 gentle experiments. Pros: Extremely safe; all materials are edible‑grade or non‑hazardous; encourages sensory play. Cons: Limited repeatability—most items are single‑use; the science explanations are very basic. Overall: Perfect for introducing preschoolers to cause and effect, but not a long‑term investment.
For Ages 6–9: KiwiCo “Crate” Subscription (Chemistry & Physics)
KiwiCo’s monthly subscription boxes are a parent favorite because each crate focuses on a single engineering or science project. The chemistry crate, for example, might involve making a polymer bouncy ball or a pH‑testing lab. Pros: High‑quality materials; includes a beautifully illustrated magazine with science stories; projects are designed for independent work with minimal adult help. Cons: Subscription model can be pricey; you don’t know the exact project ahead of time. Overall: Excellent for building a routine of curiosity and for children who enjoy surprise packages. The projects are genuinely functional and often lead to open‑ended play.
For Ages 9–12: Thames & Kosmos “Chemistry C500”
This classic kit is a staple in many homes and classrooms. It contains 28 experiments involving real lab equipment—test tubes, pipettes, a small safety goggles, and chemicals in child‑safe quantities. Experiments range from making a fire‑extinguishing reaction to growing a “chemist’s garden”. Pros: Strong educational foundation; manual explains scientific concepts clearly; many experiments can be repeated if you replenish consumables separately. Cons: Requires careful adult supervision for some steps (especially when using small flame or chemicals); some parts are fragile. Overall: A fantastic step‑up for kids who are ready for more formal experimentation. The kit builds confidence and lab skills that prepare them for middle school science.
For Ages 12+: MEL Science “Physics” Kit (with VR option)
MEL Science offers advanced kits that blend physical experiments with virtual reality. Each kit covers a specific topic—like electromagnetism or optics—and includes high‑end components such as neodymium magnets, laser diodes, and precision scales. The VR app allows children to explore atomic‑level animations of the science they are performing. Pros: Cutting‑edge technology; deep conceptual learning; materials are professional grade. Cons: Expensive; requires a smartphone or tablet for VR; some experiments are complex and may frustrate less patient teens. Overall: Ideal for the aspiring young scientist who wants to go beyond school curriculum. The company also provides live online lessons with real scientists.
Budget Favorite: Scientific Explorer “Mind Blowing Science Kit”
Priced under $20, this kit packs a punch with 11 experiments, including color‑changing volcanoes, light sticks, and a “sun print” activity. Pros: Very affordable; instructions are clear; uses common household items for many steps. Cons: Many items are single‑use; science explanations are brief; packaging is not durable. Overall: A great entry‑level choice for a rainy afternoon activity, but don’t expect long‑term educational depth.
—
Safety and Supervision Tips
Even the safest kit requires responsible handling. Here are practical guidelines for parents:
- Set up a designated work area. Cover the table with newspaper or a plastic mat, and keep it separate from food preparation surfaces. For messy experiments, consider using a large baking sheet as a tray.
- Pre‑read the instructions. Before handing the kit to your child, read through every step yourself. Identify potential hazards (pinching, splashing, heating) and prepare necessary safety gear (goggles, gloves, apron).
- Establish rules. Teach your child to never taste or smell chemicals, to wash hands after each experiment, and to clean up spills immediately. For kits with batteries or electronics, explain the dangers of short‑circuiting.
- Supervise appropriately. For children under 8, remain within arm’s reach. For older kids, check in periodically and be available for troubleshooting. Resist the urge to take over—let them make small mistakes and learn from them.
- Store kits properly. Keep chemicals in original containers, tightly sealed, and out of reach of younger siblings. Label any mixed solutions and discard them according to instructions. A separate drawer or bin for “science gear” can keep everything organized and accessible.
—
How to Get the Most Out of a Science Kit
A science kit is a tool, not a lesson. To maximize its value, consider these strategies:
1. Extend the Learning
After completing an experiment, ask open‑ended questions: “What do you think would happen if we used more baking soda?” or “How does this relate to what we learned about weather?” Encourage your child to keep a science journal where they can draw diagrams, write predictions, and record results. Many kits have companion websites with additional experiments—use them.
2. Create a Science Routine
Designate one afternoon per week as “Science Saturday.” Rotate between kits, outdoor exploration, and documentary watching. This builds anticipation and normalizes scientific thinking as part of everyday life.
3. Combine Multiple Kits
If your child loves a particular topic (e.g., robotics), consider bundling a beginner robotics kit with a more advanced one that uses the same components (like LEGO®‑compatible bricks). This allows for incremental challenge and creativity.
4. Encourage Collaboration
Invite a friend or sibling to join. Group experiments teach communication, sharing, and teamwork. For introverted children, working one‑on‑one with you can be a safe space for asking questions.
5. Document and Celebrate
Take photos or short videos of the coolest moments—a glowing reaction, a flying rocket, a perfectly formed crystal. Share them with grandparents or on a private family channel. Celebrating achievements boosts confidence and reinforces interest in science.
—
Conclusion
Choosing the right science kit for your child is a decision that goes beyond price or popularity. It’s about matching the kit’s complexity, safety, and educational value to your child’s unique developmental stage and interests. From the toddler’s first fizzing reaction to the teenager’s soldering of a circuit board, each experiment is a brick in the foundation of lifelong learning. As a parent, you don’t need to be a scientist yourself—you just need to provide the opportunity, encouragement, and a little bit of tolerance for mess. The reviews and tips in this guide should help you navigate the vast landscape of science kits with confidence. So go ahead: pick one, clear the kitchen table, and watch your child’s eyes light up with the joy of discovery. The best experiment of all is the one you do together.