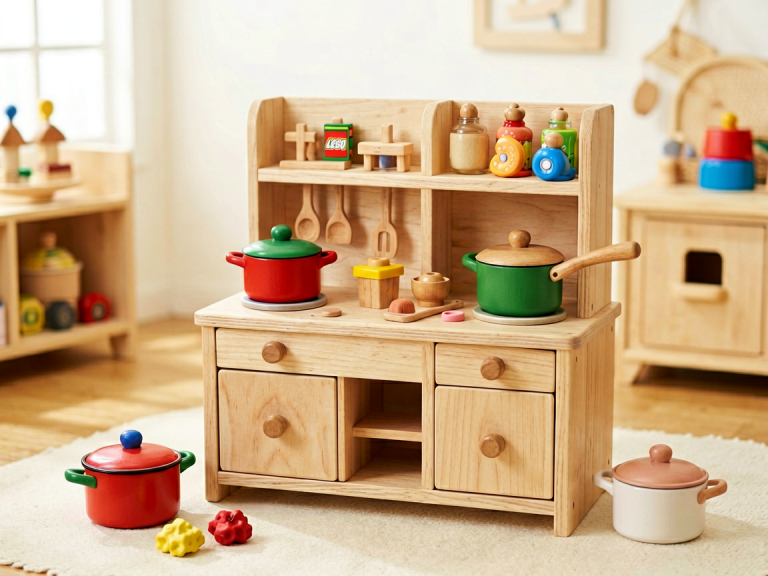
Introduction: Why a Play Kitchen for a 9-Month-Old?
Title: The Ultimate Parent Guide to Buying Play Kitchens for 9-Month-Olds: Safety, Sensory Play, and Developmental Milestones
When you hear “play kitchen,” you probably picture a toddler standing at a miniature stove, pretending to stir a pot. But what about a baby who is barely sitting up, still exploring the world through mouthing and grasping? The idea of buying a play kitchen for a 9-month-old might seem premature, yet it is one of the most developmentally enriching investments you can make at this age—provided you choose the right one. At nine months, babies are in a critical window of sensory-motor development. They are learning cause and effect, object permanence, and fine-motor coordination. A thoughtfully selected play kitchen can become a safe, stimulating environment for those early discoveries. However, the commercial market is flooded with kitchens designed for preschoolers—filled with small parts, hard edges, and electronic sounds that can overwhelm or even harm an infant. This guide will walk you through every consideration, from safety certifications to material choices, from age-appropriate features to budget-friendly alternatives, so you can confidently select a play kitchen that nurtures your 9-month-old’s curiosity without compromising safety.
—
1. Understanding Your 9-Month-Old’s Developmental Needs
Before you browse any product listings, it’s essential to understand exactly what a nine-month-old can and cannot do. Most babies at this age are sitting independently, may be starting to crawl or pull to stand, and are fascinated by objects they can grasp, shake, bang, and mouth. Their vision is still developing depth perception, and they are highly attracted to bright colors, high-contrast patterns, and reflective surfaces. Mentally, they are beginning to understand that objects exist even when out of sight (object permanence) and are experimenting with simple cause-and-effect actions: “If I push this button, a sound happens.” However, they lack the cognitive ability for pretend play—they will not “cook” or “serve” food. Instead, they will explore the kitchen’s physical properties: the texture of a plastic knob, the sound of a door opening, the feel of a soft fabric vegetable. Therefore, any play kitchen you buy must prioritize sensory exploration, gross-motor practice (reaching, pulling, batting), and absolute safety for mouthing and unsteady movements. Avoiding small parts, sharp corners, and toxic materials is non-negotiable.
—
2. Safety First: Non-Negotiable Standards for Infants
Safety is the single most critical criterion when selecting any toy for a 9-month-old, and play kitchens are no exception. Here is a detailed checklist:
2.1 Material and Finish
Choose kitchens made from solid wood (with a non-toxic, water-based finish) or high-quality BPA-free, phthalate-free plastic. Avoid particleboard or MDF with laminate coatings that can peel or splinter. Test the surface by running your fingers over all edges—they should be smooth and rounded. If the kitchen has painted details, verify that the paint is lead-free and meets ASTM F963 (U.S.) or EN71 (EU) safety standards. For wooden kitchens, look for the “Safety 1st” or “GREENGUARD Gold” certification, which ensures low chemical emissions. Plastic kitchens should be thick-walled without sharp mold lines. Remember that at 9 months, everything goes into the mouth, so any removable piece smaller than a toilet paper roll (1.5 inches in diameter) is a choking hazard and must be avoided or permanently attached.
2.2 Stability and Weight
Infants pull themselves up on furniture, and a lightweight play kitchen can tip over, causing injury. The kitchen should be wider at the base than at the top and weigh enough (at least 15–20 pounds) to resist being pulled down. If the kitchen has legs, ensure they are wide-set and have non-slip rubber feet. For added security, you can anchor the kitchen to the wall using furniture straps (included in many childproofing kits). Test the stability yourself: give the kitchen a gentle push from the side and front to see if it wobbles. If it does, it’s unsafe.
2.3 No Small Parts or Magnets
Many play kitchens come with pretend food, utensils, or pots. For a 9-month-old, these should be large, soft, and attached if possible. Avoid any kitchen that includes plastic fruits smaller than 2–3 inches, buttons that can be popped off, or magnets (which can be swallowed and cause intestinal damage). Some brands sell “sensory bags” or “soft food sets” made of fabric, which are safer, but you must still supervise closely.
2.4 Pinch Hazards and Sharp Edges
Check all moving parts: doors, oven fronts, and knobs. Doors should have soft-closing mechanisms or be designed to be removable. Knobs should be large, smooth, and either too stiff to turn or made of soft silicone. Avoid kitchens with metal hinges that could pinch tiny fingers. Run a finger along every edge, including the inside of shelves—any roughness or sharpness is unacceptable.
2.5 Cord and Battery Safety
If the kitchen includes electronic features (lights, sounds, timers), ensure the battery compartment is secured with a screw (not a clip) to prevent battery ingestion. Remove any long cords or strings that could pose strangulation risks. For a 9-month-old, passive, non-electronic kitchens are actually safer and more developmentally appropriate because they encourage open-ended exploration without overstimulation.
—
3. Key Features to Look for in a 9-Month-Old’s Play Kitchen
Not all play kitchens are created equal. Here are the features that will turn a generic toy into a rich developmental tool for your infant.
3.1 Sensory-Rich Surfaces
Babies learn through texture. Look for kitchens that incorporate a variety of tactile experiences: a wooden knob that is smooth, a silicone mat that is squishy, a mirror on the “stove” or “refrigerator” door (mirrors help with self-recognition and visual tracking), and maybe a crinkly fabric “sponge” or a soft fabric “vegetable” that makes a rustling sound. Some high-end kitchens include textured grips on handles or contoured panels that invite patting and rubbing. Avoid kitchens that are all one uniform plastic surface—they offer little sensory variety.
3.2 Easy-to-Reach, Low Shelving
At 9 months, your baby is likely either sitting or crawling. The kitchen should have open shelves or hooks at a height that your baby can reach while sitting or kneeling (roughly 6–12 inches off the ground). Avoid high cabinets that are just for show; they encourage dangerous climbing. Ideally, the kitchen has a “work surface” that is low enough for a seated baby to bat at or rest their hands on. Some minimalistic kitchens are essentially a low table with a stovetop painted on top—these are excellent for this age.
3.3 Cause-and-Effect Elements
While your baby won’t engage in pretend play, they will love actions that produce a clear, immediate result. Look for:
- A large, round knob that, when turned, makes a clicking sound (even better if it lights up).
- A door that, when pushed, produces a soft “pop” (magnetic or spring-loaded).
- A button that plays a single, gentle sound (like a bell or a “ding” ) and then stops.
- A sliding element, like a drawer that glides out easily and stops with a slight resistance.
Avoid kitchens with loud, continuous music or flashing strobe lights—these can overstimulate a 9-month-old’s developing nervous system. Opt for kitchens that offer one or two simple, low-volume feedback mechanisms.
3.4 Interchangeable or Garment-Like Play Accessories
Instead of hard plastic “food,” consider kitchens that come with fabric play food (e.g., a soft felt carrot, a padded felt apple). Better yet, look for accessories that can be attached to the kitchen with Velcro or straps so they don’t become projectiles. Some brands offer “play kitchen aprons” that have toys sewn onto them—these are not part of the kitchen itself but can be used alongside it.
3.5 Portability and Height Adjustability
A 9-month-old’s play space changes frequently. A stationary, heavy kitchen might be cumbersome. Consider a compact, lightweight kitchen that can easily be moved from the living room to the nursery. Alternatively, some wooden kitchens have adjustable legs that can be set low now and raised later as your child grows. This “grows-with-them” feature extends the lifecycle of the toy for years.
—
4. Materials Comparison: Wood vs. Plastic – Pros and Cons for Infants
The debate between wood and plastic play kitchens often comes down to aesthetics versus practicality. For a 9-month-old, the choice matters more than you think.
| Material | Pros for Infants | Cons for Infants |
|———-|——————|——————|
| Solid Wood | Durable; doesn’t off-gas like some plastics; often has a natural, warm texture; can be sanded and repainted; heavier and more stable; looks beautiful in any room. | More expensive; may have sharp corners if not properly rounded; requires careful maintenance (avoid water damage); some cheaper wood kitchens use toxic glues—always check certifications. |
| High-Quality Plastic | Lightweight; easily cleaned with wipes; often brightly colored (attracts visual attention); typically molded with rounded edges; can include built-in sensory features (e.g., textured knobs). | Can tip over more easily if not weighted; some plastics contain BPA or phthalates—must check labels; can feel cold and less inviting; may break or crack if dropped; lower-end plastic kitchens often have sharp mold seams. |
Recommendation for 9-month-olds: High-quality, solid wood with a non-toxic finish is the safer, more eco-friendly choice if you can afford it. However, if you choose plastic, only buy from reputable brands (e.g., KidKraft, Step2, Little Tikes) that explicitly state “BPA-free” and “phthalate-free” and have passed ASTM safety tests. Avoid generic plastic kitchens from unknown online sellers—they often contain harmful chemicals and have sharp edges.
—
5. Age-Appropriate Play Kitchen Designs: What to Look For and What to Avoid
The design of the kitchen should match your baby’s physical abilities. Here is a visual breakdown:
5.1 Designs That Work
- The “Open-Front” Kitchen: No doors on the front; just a low shelf and a stovetop. Your baby can sit in front of it and bat at the knobs, mirrors, or hooks.
- The “Compact Counter” Style: A low, rectangular table with a painted stovetop, a pretend sink, and a few attached knobs. No fake cabinets—just a flat surface. This prevents baby from pulling open doors and getting stuck.
- The “Soft Play Kitchen”: Some brands (like Manhattan Toy) make soft fabric play kitchens with foam structures that have crinkle paper, squeakers, and mirrors. These are incredibly safe for mouthing and can be washed in the machine. They are not “kitchen” in the traditional sense but serve the same exploratory purpose.
5.2 Designs to Avoid
- Multi-story kitchens with ladders or stairs—your baby will try to climb them and fall.
- Kitchens with dangling fabric cords (like a pretend phone cord) that can strangle.
- Kitchens with a removable “ice maker” or “water dispenser” that has small plastic cubes.
- Any kitchen that requires assembly with exposed screws or unstable panels.
—
6. Budget-Friendly and DIY Alternatives
You don’t need to spend hundreds of dollars to give your 9-month-old a fantastic sensory kitchen experience. Here are creative, lower-cost options:
6.1 The “Sensory Board” Kitchen
Purchase a wooden sensory board (often sold for toddlers) that features latches, knobs, doors, and zippers. Mount it at floor level against a wall, or prop it up on a low shelf. Add a few large plastic spoons and a soft fabric “pan” (an upside-down bowl with a fabric cover). This costs $30–$50 and provides all the cause-and-effect play of a full kitchen.
6.2 The “Real Object” Kitchen
For under $20, go to a thrift store and buy a set of large, unbreakable stainless steel bowls, a wooden spoon, and a silicone muffin tin. Place these inside a low cardboard box with the sides cut down. Cover the box with contact paper that has a printed stovetop design. Your baby can bang, stack, and mouth the real objects, which feel much more interesting than plastic toys. Always ensure real objects are free of sharp edges and are large enough to not fit in the mouth.
6.3 The “Floor Mat” Kitchen
Some manufacturers sell soft, padded floor mats that have a printed kitchen design (stove, sink, oven). Lay this mat on the floor and scatter a few large, soft toys on top. Your baby can crawl over it, pat the pictures, and even lie on it while exploring. This is the safest and least expensive option, perfect for a 9-month-old who is not yet standing.
—
7. Top Brand Recommendations (Safety-Approved for 9 Months)
While I cannot endorse specific products, here are brands that consistently meet infant safety standards and have a reputation for durable, thoughtfully designed play kitchens:
- Hape: German brand; all wood, water-based paints, highly durable. Their “Mighty Chef” kitchen is low to the ground and has rounded corners. Check that you can remove small accessories.
- Manhattan Toy: Specializes in soft play; their “Bubble Kitchen” is a fabric-and-foam sensory station ideal for babies 6+ months.
- KidKraft: Some of their simpler models (like the “Let’s Cook Kitchen”) are made of wood with non-toxic finishes, but always double-check for small parts.
- Step2: If you go plastic, Step2’s “Corner Cafe” is wider and more stable, with large knobs and no small accessories.
- Lovevery: They offer a “Play Kitchen” for older toddlers but also sell a “Sensory Spinner” and “Sink Set” that can be paired with a low table—check their offerings for 9-month-olds.
Red flags in any brand: “Suitable for ages 3+” label on the box. If a kitchen is recommended for 3+ years, it almost certainly contains small parts or design elements unsafe for a 9-month-old. Look for “ages 6 months+” or “ages 12 months+” only if you have verified every component.
—
8. How to Set Up the Play Kitchen for Maximum Safety and Engagement
Once you’ve chosen your kitchen, the environment matters just as much as the toy itself.
8.1 The Perfect Location
Place the kitchen on a carpeted area (cushions falls) or a soft foam play mat. Keep it away from sharp furniture edges, curtains with long cords, and electrical outlets. Ensure the kitchen is at least 2 feet away from any wall so your baby can crawl around it safely.
8.2 Rotation of Accessories
For a 9-month-old, less is more. Rotate only two or three accessories at a time—e.g., a soft fabric bowl and a wooden spoon this week; a crinkly carrot and a mirror the next. This maintains novelty without overwhelming them.
8.3 Supervision
Always supervise your baby during play. Even the safest kitchen can become hazardous if a baby manages to chew off a piece of fabric or tip the kitchen over. Never leave a 9-month-old alone with a play kitchen, especially if it has any removable parts.
8.4 Cleaning
Wooden kitchens should be wiped with a damp cloth and mild soap (not soaked). Plastic kitchens can be disinfected with baby-safe wipes. Fabric kitchens can often be machine-washed—check the label. Regularly inspect for loose screws, splinters, or frayed fabric.
—
9. Final Thoughts: The Best Play Kitchen Is One That Grows With Your Baby
A play kitchen bought at 9 months should not be a one-season wonder. Look for a kitchen that adapts: perhaps it has legs that can be extended as your baby learns to stand, or shelves that can be raised later. The best purchase will transition from a sensory exploration station now to a pretend-play hub when your child turns 18 months, and eventually to a full-blown imaginative role-playing center at age 3. By investing in a safe, high-quality, and thoughtfully designed kitchen today, you are not just buying a toy—you are creating a small world where your baby can safely satisfy their curiosity, build motor skills, and begin the lifelong love of discovery. Remember, at 9 months, the kitchen isn’t for “cooking.” It’s for touching, turning, listening, and learning. Choose wisely, and enjoy watching your little chef explore their very first kitchen.